Thursday, December 8, 2011

Cookie (The Elf on the Shelf) Update

Here is what Cookie has been up to these past few days....

Day 7: Today we woke up to a note that read.."A candy cane for you, a candy cane for me...he rest you'll find on the Christmas tree."


Day 8: Cookie made a snow angel in the flour on the cookie sheet.


Day 9: Cookie left a note explaining why he was sitting next to a new (replacement) ornament


the note says: Good morning, Natalie. I am in your tree with a special gift from Santa. I told Santa that your Christmas tree fell over and the Santa ornament broke. He worked his magic and here I am with a new one for you and your mom. I love you!
**What Cookie didn't mention is that the cats knocked the tree over**


Day 10: Cookie made elf sized donuts!


Day 11: Today we found Cookie on the couch eating popcorn while watching The Polar Express!

Monday, December 5, 2011

Cookie...our Elf on the Shelf

We adopted an Elf on the Shelf which Natalie names, Cookie. Here are Cookie's adventures up to this point...

Day 1: Cookie poured a bowl of cereal for Natalie and was waiting in the refrigerator with milk that he made his favorite color.


Day 2: Cookie was sitting on the love plaque which is part of a wall display in the living room.


Day 3: Cookie was caught in the candy jar! He must have eaten a few peppermint kisses by the evidence on the counter.


Day 4: Cookie was hanging by the pendulum of the clock

Day 5: Cookie is admiring a picture that Natalie colored for him.


Day 6: Cookie left a note in the bathroom using toothpaste.

Sunday, December 4, 2011

Pinterest projects

I will admit that I absolutely LOVE Pinterest! I have come across so many adorable craft projects, recipes, DIY projects and home decor ideas...just to name a VERY few! Here are a few projects that I saw on pinterest and decided to make my own.
First is the wreath that I found stunning. It was so darn easy to make, too.
I followed the directions from this blog to make it.

Here is my finished project. I wanted mine to look just like the one on the blog because I loved the black, white and pink color combo. I plan on making more in a variety of colors.


Over Thanksgiving break, I was feeling very crafty. Natalie made these adorable gumball machines all by herself. She loved painting everything! I am not a fan of painting, so she was enjoying it! We made them out of clay pots and the clay saucer. I figured out that you should get the saucer that would fit to a very small clay pot so that it fits on the glass bowl nice and snug. I bought pom poms for the gumballs.

Saturday, December 3, 2011

Thankful for....

I decided to make these adorable turkeys with my class. They were so easy, adorable and thoughtful. The body of the turkey is simply a toilet paper roll (or paper towel roll cut to size) My plan was to paint them brown, but the brown paint was more gold which I loved even more. The body is a small paper plate painted yellow. I had each child trace and cut five feathers and they were to write things they were thankful for. I love that everything about this project is from scraps or recycles. All the construction paper was from the scrap bin and the body is obviously recycled from a toilet paper roll. Very simple yet fun project.


Halloween 2011

I have not been very reliable when it comes to blogging.

I'll back up to Halloween. Natalie decided to be a pirate this year. I LOVE Pirates of the Caribbean so this costume choice made momma happy! I had so much fun making her peacock costume last year that I wanted to make her pirate costume this year.I did another tutu in burgundy, gold and black. I also made her pirate shirt. I just bought a black t shirt and cut out a "girly" skull and cross-bone design from felt. I used fabric glue to attach it to the black shirt. I used some leftover tulle to put a bow on the skull.I found some cute black and white striped arm warmers and we used those and her pirate socks. They were long enough to cover up the hole in her black leggings-bonus-one last use out of those leggings before I threw them away. I got the skull and cross-bone necklace and pirate hat from Halloween City.

Monday, August 22, 2011

Halloween on my mind....

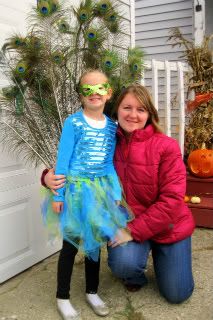
I already have Halloween costume ideas on my mind. Last year Natalie was a peacock. I knew I wanted to make something. I had a bazillion peacock feathers from my aunt and wanted to put them to use. Natalie was so excited with the idea! She even won "most creative costume" at the mall. This year, Natalie has already told me about 10 different ideas in the last week...anything from a pink cowgirl to a ghost with a mustache. I love the tutu skirt from last year, and want to incorporate that into this years costume. She seems most excited about being a pink cowgirl, so I think I need to start thinking about that!
This is last years costume
Photobucket

Saturday, July 16, 2011

Mother's Day Card

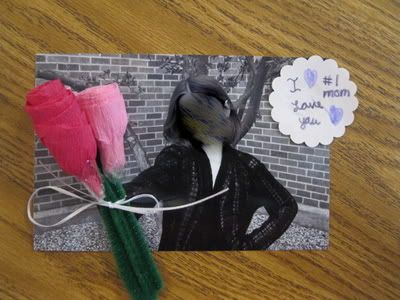
I was cruising around the internet looking for fun craft ideas when I came across THIS blog and picture. I knew immediately that I wanted to make it, but Valentine's Day had just passed and I wanted to make this NOW! So, it hit me, I could do this for a Mother's Day project with my fourth graders. Instead of lollipops, we'd insert a flower. It would be simple and inexpensive, but so sweet at the same time. I took a picture of each student with their arm reaching towards me. I let the kids choose black/white or color print (edited at home in Picasa before uploading to Walgreens) and then printed those for about 10 cents each at Walgreens. I bought 2 rolls of crepe paper for the flowers. I followed THIS flower tutorial, which was easy for the kids to do. I modeled how to make it for the kids and then left the tutorial on the Promethian Board for a reference. I had a station set up in the back of the room for the "finishing touches." We hot glued the flower to a green pipe cleaner stem. I used a hole puncher to punch 2 holes for the stem to slide in. The kids tied a bow around the stem and that was it.
This is the finished product.
Photobucket

Friday, July 15, 2011

Owl project

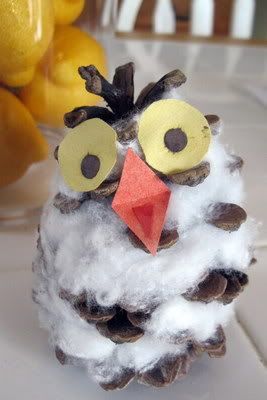
I find a ton of awesome pine cones in my yard every year. I pick them up knowing I'll find a cool project for them. I came across a cool owl pine cone project and made it with my fourth graders one day after a bird man visit. I thought it might be too "young" for them but they LOVED it!
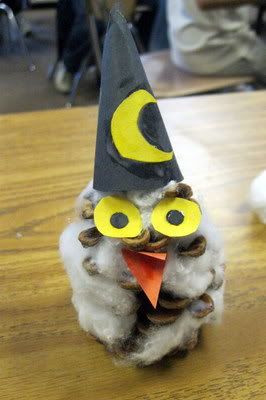
I gave each child one pine cone. They dabbed the pine cone with liquid glue. Each student had about 3 cotton balls that they pulled apart and "stuffed" on the glue drops and in the pine cone. Using the tip of a pencil helped push the cotton ball into the pine cone better. After the "body" was full of cotton, cut out 2 yellow circles and 2 smaller black circles for the eyes. Fold a piece of orange paper in half and cut a triangle for the mouth. All done! Some kids got creative and added wizard hats. It was very fun!
Photobucket
One of the "wizard" owls
Photobucket

Thursday, July 14, 2011

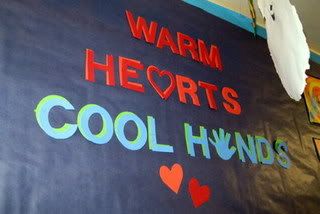
Warm Hearts, Cool Hands Project

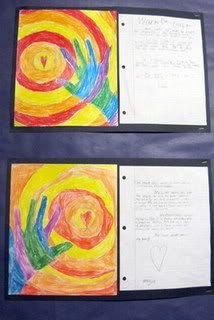
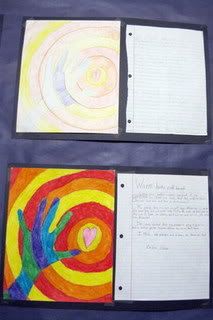
I was looking for cool projects for kids when I came across this page. I had my fourth grade students trace their hands and then make the "rings" around their hand with a hand made protractor. I have also seen a template that has the rings and then the kids just trace their hands. Go HERE and you'll see the template for the rings. When this kids were done, they did a writing project about someone who warms their heart and why. They loved this project and we had many compliments since they were displayed on the bulletin board in the hallway.
Photobucket
Photobucket
Photobucket
I love how each one is "their" hand and work. Their and right handed kids, left handed kids, kids who chose to use colored pencils, crayons and even glitter crayons.

Back to blogging?? First thing...a few school crafts

I guess I am going to start blogging again. I've had a desire to share some of my crafty stuff and just every day life with words, not just photos on facebook. So, the first things I wanted to share were some school crafts.
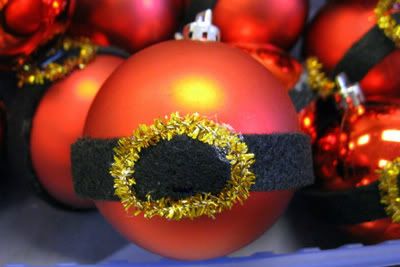
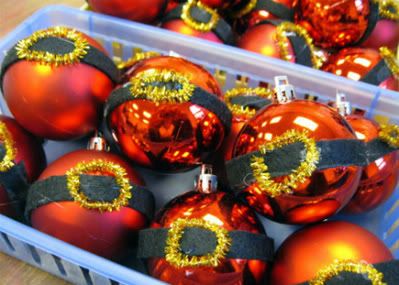
Right before Christmas, I volunteered in Natalie's classroom to make these Santa's belly ornaments. It literally cost me about $5 is supplies and I helped make enough for the entire class of kids...about 25. The supplies I used were...
red ornaments that I bought at the Target $1 spot (8 ornaments in a tube for $1)
black felt
gold pipe cleaner
I precut the black "belts". I had the kids spread modge podge on the belt and then wrap it around the middle. I snipped a piece of gold pipe cleaner and had the kids shape it into a belt buckle. There were all sorts of buckle shapes, but that's what made it a first grade project and "their" own project. It's not my ornament so I didn't want to shape the buckle. I learned to hot glue the buckle onto the ornament. I wrote each child's name on a piece of tape with the year and put it on the back of the ornament. Here is the finished product.
Photobucket
and here is a picture of all the ornaments. I love how each one is so different.
Photobucket